

In this article, we explain how to add users to your seller account and how to assign permissions according to the tasks they need to perform in Mirakl.
- What user management is used for
- How to access Users
- What permissions you can assign
- How to create a new user
- How to modify permissions for an existing user
- Best practices
- Summary
User management allows you to give access to other people in your team without sharing the same credentials.
Each user can have specific permissions depending on their role: shop management, inventory, accounting, support, orders or messages.
This way, each person can access the areas they need and receive notifications in their own email account.
To manage your shop users, go to:
- Location: Settings > Users
- Direct URL: access Users
When creating or editing a user, you can assign permissions based on the tasks they will perform.
| Permission | What it allows |
|---|---|
| Shop administration | Allows access to the main dashboard, settings, shop information, user management and API configuration. |
| Inventory management | Allows access to inventory, the administration panel, messages and product mapping. |
| Accounting | Allows access to accounting documents and transaction history. |
| Support | Allows access to orders and messages. Depending on the configuration, it may include read-only orders and read or write access to messages. |
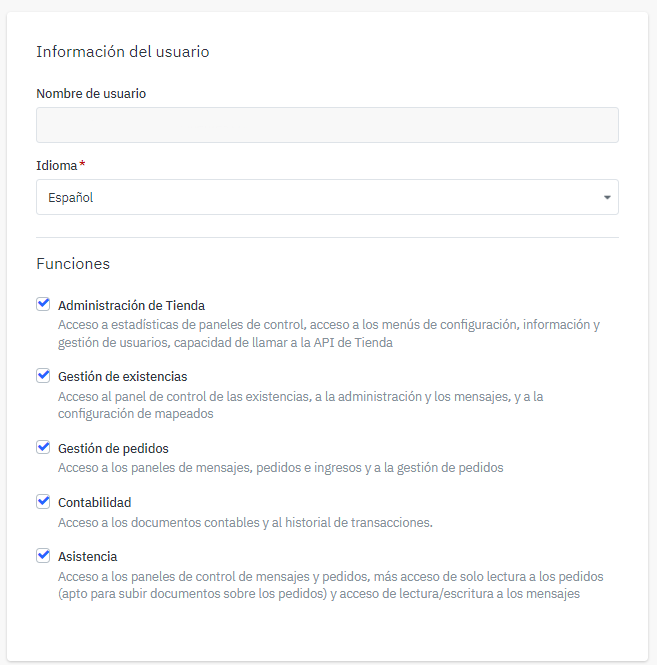
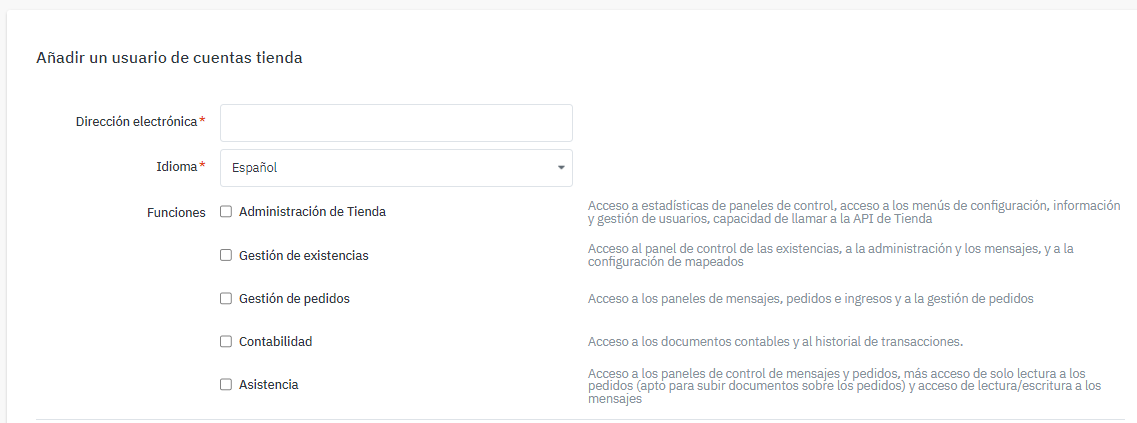
To create a new user:
- Go to Settings > Users.
- Select Create user at the top right.
- Enter the new user’s email address.
- Assign the permissions that match their role.
- Save the changes.
You can also modify permissions for users that have already been created.
- Go to Settings > Users.
- Find the user you want to modify.
- Open their settings.
- Add or remove the required permissions.
- Save the changes.
- Create individual users: each person should access with their own email address.
- Assign permissions according to the role: avoid giving access to areas the user does not need.
- Review permissions periodically: especially if your team organisation changes.
- Update access when someone stops working on the account: check whether you need to modify or remove their permissions.
- Protect credentials: do not share passwords or access details through unsecured channels.
- You can add users to your account: go to Settings > Users.
- Each user can have specific permissions: shop administration, inventory, accounting or support.
- You can create users from Create user: enter the email address, assign permissions and save the changes.
- You can modify existing permissions: as long as your own user has those permissions.
- Avoid sharing credentials: create individual access for each person in your team.